Configuration
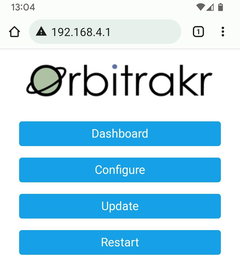
On initial startup Orbitrakr creates a Wi-Fi access point with SSID Orbitrakr and password password. Connect to this, for example from a smartphone. Open a web browser and navigate to 192.168.4.1 - your phone may do this automatically for you when you connect since Orbitrakr presents a “captive portal”. You should see the main menu. Click the Configure button.
On the configuration page choose a new password for the built-in Wi-Fi access point and a new name for it if you want, then enter the SSID and password for your regular Wi-Fi network.
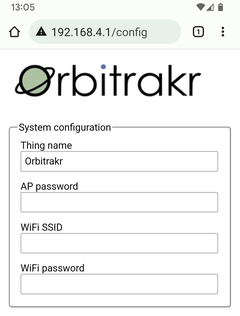
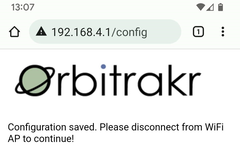
This is the minimum information that must be entered. You can enter more, but it is probably more convenient to allow Orbitrakr to connect to your Wi-Fi network and then enter the remaining information via a browser on a desktop or laptop computer. Scroll down and click Apply. You will see a confirmation message asking you to disconnect from the access point. When you do so, Orbitrakr will restart and connect to your network.
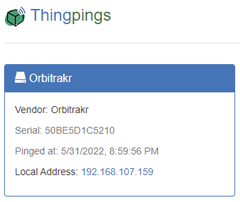
Orbitrakr supports the Thingpings service. To find the device on your local network you can visit www.thingpings.com and click on the Things tab. Click Refresh if you don’t immediately see it.
Open a web browser and browse to the address of the device on your local network. From the menu, choose Configure. When prompted, enter a username of ‘admin’, and the same password that you just configured for the local access point. Now the remaining settings can be configured.
Rotator
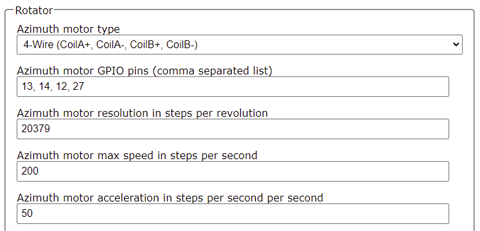
Choose the type of motor driver for each axis. The options are:
- A driver that requires Step and Direction signals, e.g. A4988-based board or TB6600 module.
- A driver that directly drives the coils of a stepper motor using two wires.
- A driver that directly drives the coils of a stepper motor using four wires, e.g. ULN2003-based board driving 28BYJ-48 motor.
Enter a comma-separated list of the pin numbers that are connected to the driver, in the order shown. The numbers should be the “Arduino digital pin” numbers (which are typically labelled on development boards and modules), not the actual pin numbers or port/bit numbers of the ESP32 chip itself.
Enter the number of steps per revolution. This is the number of full motor steps for a complete revolution of the axis. It includes the motor itself, any gearbox that is part of the motor, and any gearing between the output of the motor and the axis. For example, the 28BYJ-48 motor has 32 steps per revolution and an integrated gearbox with a ratio of 25792:405 (about 63.684). So if this motor drives the axis directly enter 2037.88.
Enter the maximum motor speed in steps per second. For example, with no load the 28BYJ-48 motor can be driven at about 300-400 steps per second before it skips steps, so 200 steps per second is a reasonably conservative maximum.
Enter the maximum motor acceleration in steps per second per second. Allow for the fact that the motor is loaded by the inertia of the axis and the antenna. A good starting point is half the maximum speed (i.e. two seconds to accelerate from rest to top speed). Lower values will produce smoother movement with less likelihood of skipping steps.
Tracker
![]()
If you want to track a specific satellite, enter its NORAD catalog number (typically five decimal digits).
Enter the latitude (-90 to +90) and longitude (-180 to +180) of the Orbitrakr location. This information is needed to calculate the “look angle” of a satellite at a given position in orbit from your location on the ground. Three decimal places of precision is sufficient.
TinyGS Station
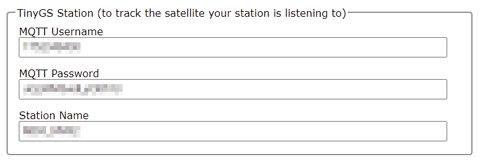
Orbitrakr can follow a TinyGS station that is using the Auto Tune feature to configure its receiver for different satellites as they come in to view. If you want Orbitrakr to automatically track the satellite that such a station is listening to, enter your TinyGS MQTT username and password, and the name of the station. The MQTT username and password are the ones that you get from the TinyGS Personal Bot on Telegram when you set up your station. The station name must be the same as it is entered in the TinyGS station configuration, the same as it appears on the TinyGS web site.
Display

If you have a display connected, enter a comma-separated list of the pin numbers that are connected to it. Enter the SCL pin first, then SDA.
Troubleshooting
When it starts up Orbitrakr offers its own Wi-Fi access point for about 30 seconds to allow you to connect directly if desired. If you don’t, it will then attempt to connect to the Wi-Fi network that has been configured. If it cannot connect (for example because the password is wrong, or it is out of range) it will go back to offering its own access point. So, if it does not appear on your network try reconnecting to it via the Orbitrakr access point.
For the Thingpings service to work, Orbitrakr must be able to access the internet. It needs internet connectivity for other functionality too (such obtaining the time via NTP, and obtaining TLEs from CelesTrak) so ensure that routers and/or firewalls are not configured to block it. Orbitrakr only needs outbound access - you do not need to forward any ports to it.
For the Configuration page authentication, the username is always admin and the password is the same as that set for the local access point.